Worried that your parts won’t pass the required surface finish due to your lack of understanding of the surface roughness chart? Confusion is common. There are some cases where the surface texture can lead to significant delays and failures.
This guide is designed for beginners to help them navigate the surface roughness chart to provide them the confidence to set the desired surface finish precision targets. You can now put an end to the uncertainty with step-by-step guidance from the beginning to the end of your projects. Let’s dive in!
1) What Is a Surface Roughness Chart?
A surface roughness chart definition is used to estimate the smoothness of a surface that has already undergone machining or finishing processes. The chart displays a varying degree of roughness, which is calculated using specific metrics like Ra, which is the roughness average. These metrics enable comparison of the various surface textures, which aid in decision making regarding the required finish to the project.
In simple terms, when any part is made, it doesn’t matter if it is made of metal or plastic will come with small grooves. Surface roughness is an accurate measuring instrument used to provide a description of such fine details. Meaning that it is a way of portraying the roughness and smoothness of a part.
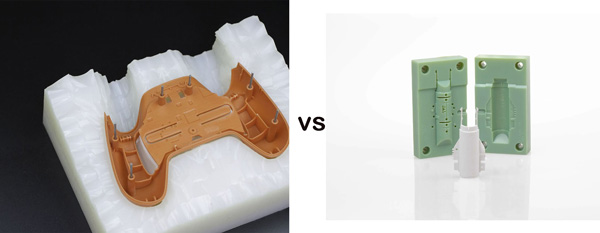
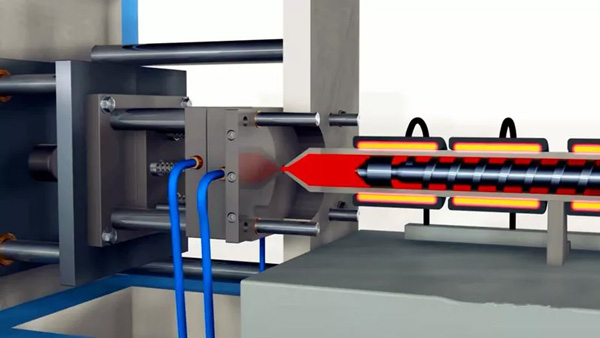
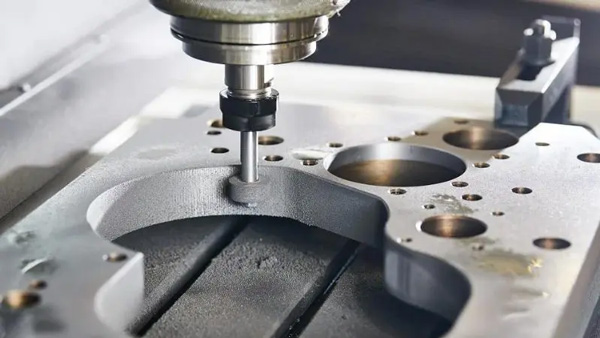
A surface finish chart has different degrees of usefulness in various forms of manufacturing, such as 3D printing, CNC machining, and even injection molding. Regardless of whether you are looking for a specific plastic part which is sealed and needs a smooth finish or one that has rougher edges to enhance grip, the chart eases the decision-making process.
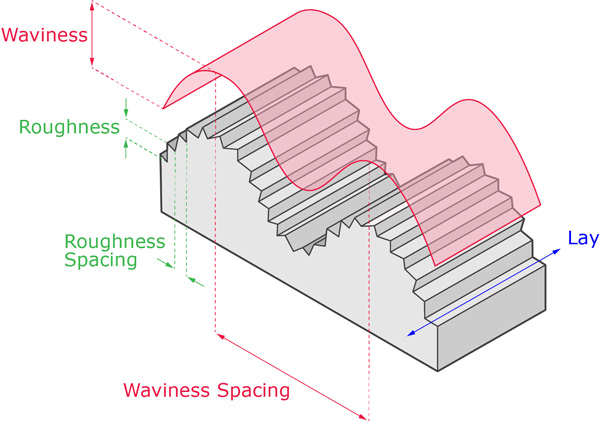
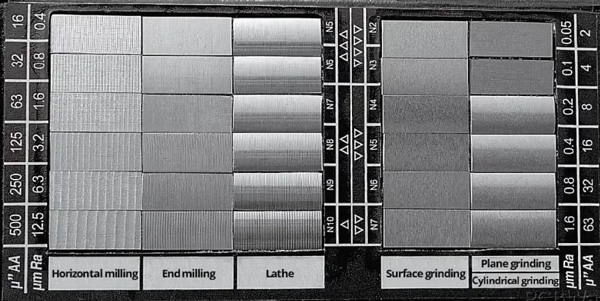
Every surface roughness chart comes with a set of numbers that can be displayed in microns and microinches; each surface roughness degree has its own number. The symbols are matched to international standards, ensuring that every nation has access to the same information.
If you lack experience with terms associated with surface finish, such as Ra, or want to evade estimating the right texture for your components, utilising a surface roughness chart is the best way to improve product quality while saving time.
Moreover, reliable manufacturing partners can also assist you in this case, like Koonze Model, who work with high-end applications, helps meet the stringent surface finishing demands that accompany such sophisticated uses.
2) Understanding Ra Values and Surface Finish Symbols
When attempting to understand surface roughness, you may see terms such as Ra value. Ra is an abbreviation for Roughness Average. Ra Surface roughness scale defines the smoothness or roughness of a surface by measuring the average height of the surface’s irregularities. The lower the Ra value, the smoother, finer, and polished the surface is, whereas a higher Ra value indicates rougher surfaces.
Ra surface roughness chart values are also given in micrometres (µm) or microinches (µin). These units of measurement play a vital role in the inspection and design of machined parts. For example, parts with high precision or tight seals should ideally have lower Ra values.
Engineers use specialised symbols on surface finish requirement drawings that represent the surface finish necessary. Surface roughness symbols convey to the machinist what level of detail is expected, oftentimes accompanied by the exact Ra value beside the symbol.
- Here’s a more detailed surface roughness comparison chart to help you understand common Ra values:
| Ra (µm) | Ra (µin) | Surface Description | Common Applications |
| 0.025 | 1 | Super mirror finish | Optical lenses, aerospace seals |
| 0.05 | 2 | Mirror-like finish | Precision sealing, medical tools |
| 0.1 | 4 | Very fine finish | High-end bearing surfaces |
| 0.2 | 8 | Fine ground finish | Hydraulic systems, polished dies |
| 0.4 | 16 | Smooth machined finish | Shafts, gears, and press fits |
| 0.8 | 32 | General machining | Standard mechanical parts |
| 1.6 | 63 | Typical machining finish | Brackets, casings, and non-critical components |
| 3.2 | 125 | Rough turning/milling | Structural parts, basic prototypes |
| 6.3 | 250 | Very rough machined surface | Forgings, low-tolerance parts |
| 12.5 | 500 | Rough as-cast finish | Cast parts, unfinished surfaces |
When working with a skilled shop, such as Koonze Model, knowing and selecting the right Ra value will guarantee the best results both functionally and aesthetically.
3) How do You Measure Surface Roughness?
Measuring surface roughness provides insight into the granularity of the given surface. Several methods exist, but the right one depends on the level of detail required and the type of part involved.
Contact Profilometer
This device possesses a small stylus that gently sweeps across the surface. It makes actual contact with the material, sensing every Scan and recording deviations in texture, measuring roughness values such as Ra.
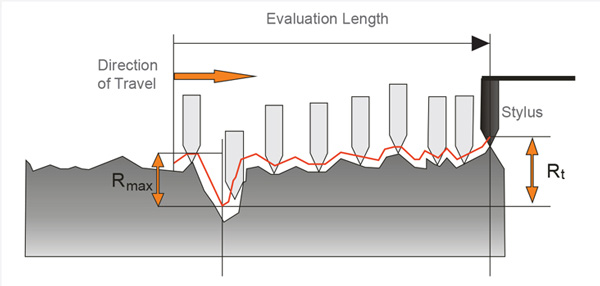
Well, this process is automated, so factories and quality control labs like how easy it is to implement. Its use is particularly advantageous for harder surfaces, and it is often considered dependable in many industries.
Non-Contact Profilometer
This tool scans the surface at a short distance without making contact using laser, light, or white light interferometry. It generates a detailed three-dimensional image of the textures of the surface without touching and ruining delicate components.
So, this technique is excellent for soft or fragile materials like polished metals or some plastics. It is also much faster, which is essential in high-throughput settings.
Optical Microscope
Optical microscope provides the ability to examine and view the advances of surface finishing with the naked eye. While this gives one a rough idea of how well the surface has been dealt with, unlike profilometers, it does not give exact numerical measurements of roughness.
Surface Sampling Area
It is critical to capture the area and the distance appropriately, as it directly impacts the outcome. In most cases, the profilometer scans a small region that is representative of the entire surface. However, if the component has different textures, it may be necessary to sample from different locations to obtain an accurate representation.
Some surfaces may have areas that appear to be smooth, but patches with rough textures can also be present.
- Why Measuring Matters
Roughness measuring is performed to verify that the components will assemble as intended, move when required, and that physical coatings or paint will adhere. To illustrate this, a rather rough surface can lead to rapid wear and tear or disable seal functionality. On the contrary, like we discussed before, too much smoothness can result in parts slipping or failure to properly grip.
So, achieving accuracy in measurement affects the functioning of a product and ensures better reliability of the product in question.
- Working with Experts
Koonze Model, your precision machining partner, for instance, has the necessary equipment and skill to ensure your components have the surface finish specified. Knowing how roughness is measured allows for clear instruction and reduces costly errors.
4) Common Surface Roughness Standards and Conversions
As with any measure, surface roughness also has different standards from one country to another. Alignment standards help facilitate clear communication between you and your manufacturer concerning the surface roughness of your parts.
One of the most popular standards is the Ra value, which is used in both ISO 4287 (international) and ASME B46.1 (USA). These standards describe the process of measuring and reporting the roughness, meaning that they will give you reliable and trustworthy results.
Other Parameters of Roughness
Apart from Ra, there are other parameters describing the surface texture, like Rz and Rt. For instance, Rz is the average height of the five highest peaks above the five lowest valleys of a given area. This is useful where the use of Ra is not sufficient to explain the texture. Rt broadly speaking measures height; it is the length from the deepest valley to the highest peak.
Surface Roughness Conversion Chart
Due to the multitude of methods, you may have to convert between the values. This is why one needs a surface roughness conversion chart, which gives a relatively straightforward explanation on how to convert roughness parameters. For example, conversion of Ra and Rz to RMS, or Root Mean Square, which is more commonly used, depending on the industry.
- Here’s a simple example:
| Ra (µm) | Rz (µm) | RMS (µm) |
| 0.1 | 0.8 | 0.13 |
| 0.4 | 3.2 | 0.52 |
| 1.6 | 12.5 | 2.1 |
| 3.2 | 25 | 4.2 |
| 6.3 | 50 | 8.3 |
| 12.5 | 100 | 16.5 |
These conversions may not be precise, but they offer a reliable baseline to reference against when measuring roughness and grasping varying requirements swiftly. Moreover, you can also find the surface roughness chart PDF.
Units and International Considerations
Different countries may use the units micrometers (µm) or microinches (µin). Make sure you specify which unit applies, especially when working abroad or sharing specs with international teams. You know mixing units can create severe problems with gaps in understanding, which results in poor-quality finishes.
- Why It Matters
Surface roughness standards can be very confusing as they come in different formats, and you might lose precision if you do not know how to convert between them.
Once mastered, obtaining a desired surface finish such as the one Koonze Model customises becomes possible. Koonze Model, for example, along with other experts, employs these standards with precision on a daily basis to ensure that the parts they manufacture for you are of outstanding quality and fulfil all your specifications.
5) Tips for Beginners When Using a Roughness Chart
For newcomers to surface roughness charts, there’s no need to worry; these charts are simple to use with just a few tips in hand. To aid chart users, we offer a few pointers aimed at making the most out of these charts.
- Don’t Skip Over the Fundamentals
Make sure you understand the main terms before you start analysing a roughness chart. For instance, Ra is the average roughness value and is mostly what you will use. Understanding the meaning of the different terms Ra, Rz, and other parameters enables you to interpret charts easily.
- Match the Units Correctly
Roughness can be measured in micrometres (µm) or microinches (µin). Always pay attention to the measurement units that your chart is using and ensure that they satisfy the needs of your project or drawing.
- Select the Appropriate Standard
There are different standards, like the ISO or ASME. Identify which one applies to your industry or scope of work. Adhering to the right standard also makes certain that you and your supplier or engineer are measuring and expecting the same things.
- Search for Symbols and Notes
In addition to the numbers, surface finish symbols are frequently placed on the charts as well. These symbols also offer more detailed surface treatment or finishing instructions. Do not ignore them- they are essential for effective communication.
- Take the Right Measurement Approach
Some parts and materials may require contact as well as non-contact profilometers. You should know which method your supplier intends to use so that you can interpret the results accurately.
- Communicate Clearly
When providing the roughness requirements, make sure it is clear and precise. Follow the surface finish roughness chart values and symbols as they are given and do not make any alterations. This minimises misunderstandings and guarantees that you get the surface finish that you want.
- Ask for Help
If there is something that you do not understand, do not shy away from asking the experts or your manufacturer. In a similar case, the Koonze Model will expertly direct you on the correct roughness level and the right way to read the charts.
With these pieces of advice, you will be confident in using the surface roughness charts and enhance your project’s outcomes.
6) Conclusion
To achieve the desired surface finish for your components, understanding the roughness chart is extremely critical. Having a sound understanding of the primary principles, like Ra, applying appropriate standards, and measuring accurately means that you avoid blunders and maintain quality. Always pay careful attention to the matching of units, symbols, and their use.
If in doubt, professionals such as the Koonze Model are always available to guide you on the right surface finish for your project. Now, enable yourself to communicate effectively and reliably get results every time. Get a quote from Koonze Model right now!