Are parts losing your budget and taking too long to produce? We can understand, yes, producing parts with consistent quality and at a manageable price is not a piece of cake. Don’t worry, the solution to the problem is right here. Injection molding? Yes! Right catch!
This guide will provide you with all the details on the injection molding process, the essential components of the machine used and finishing options available. If you are looking to manufacture accurate, durable plastic parts—be it in small runs or large quantities, this guide will enable quicker, informed decisions. Let’s jump in!

1) What is Injection Molding?
Definition of injection molding process?
“Injection molding is among the most popular manufacturing processes for the mass production of certain types of plastic parts. In this method, molten plastic is injected into a mold, which then cools down to form the final product.”
Injection molded products are prevalent in items such as automotive products (bottle caps, containers), toys, e.t.c. It’s basically used across many industries, ranging from medical to electronics and consumer goods as well.
Well, the rubber injection molding process begins by introducing plastic pellets into a heated barrel. Once the plastic is liquefied, it is injected under high pressure into a metal mold. After sufficient cooling, the molds open and parts are ejected. This method is best for mass production as you can use the same mold again and again.

One of the most notable benefits of injection molding is efficiency. It allows for thousands of identical parts to be produced with uniform quality at minimal material wastage and greater design flexibility.
Due to all these advantages, this process compensates for its initial high cost, which is usually due to the production of molds. For large-scale manufacturing where speed, detail, cost effectiveness, and volume are important factors, you can consider injection molding.
2) Key Components of the Injection Molding Process
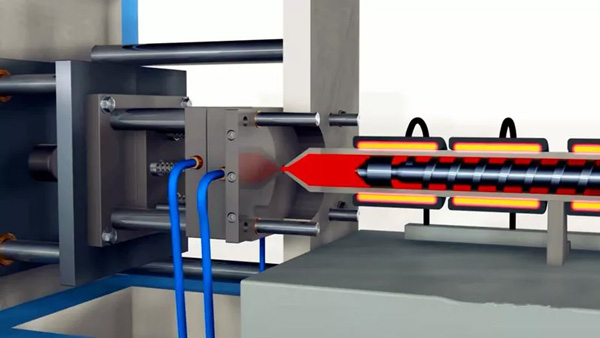
Injection molding machines consist of various parts used to make precision plastic components. Understanding these components helps understand why these processes remain fast, accurate, and repeatable.
- Here’s a quick overview of each component:
- Hopper: Supplies raw materials in the form of plastic pellets while at the same time eliminating moisture from them.
- Barrel: Using heat-controlled methods, the plastic is both melted and mixed.

- Heaters: For effective melting and flowing, the temperature of both plastic and flow channels needs to be actively managed to the proper values.
- Barrel and Reciprocating Screw: The screw rotates inside a heated barrel to move, compress, and melt the plastic resin. As the plastic melts, the screw pushes the molten plastic forward toward the mold (in injection molding) or through a die (in extrusion).
- Nozzle: It transfers molten material into the mold without losing any heat.
- Sprue, Runners, and Gates: Sprue describes the parts that lead out from the nozzle gate through which the molten material enters a mould cavity. The runners and gates serve as passageways between these chambers.
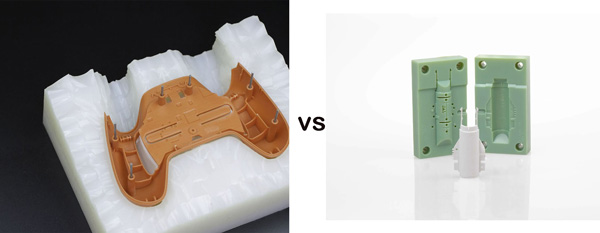
- Mold & Mold Cavity: Formation of a part requires two elements having mutual symmetry, which would be capable of bounding each element separately during forming into desirable shapes.
- Ejection System: Employed to automate the removal of parts from their moldsupon completion of manufacturing processes.
- Movable Platen: Its function is to open and close the mold during each cycle.
- Pellets: Prior to being put through machining processes, plastic materials often exist in bulk form, chipped into very small solid blocks termed pellets.
To make it easier for reference, here is a summary table:
| Component | Location | Function | Appearance |
| Hopper | Top of the machine | Feeds plastic pellets into the barrel | Funnel-shaped container |
| Barrel | Centre of the machine | Heats and mixes the plastic material | Long metal tube with heaters |
| Reciprocating Screw | Inside the barrel | Compresses and moves melted plastic | Corkscrew-shaped rod |
| Heaters | Around the barrel | Provide controlled heat for melting plastic | Metal bands |
| Nozzle | Tip of the barrel | Transfers molten plastic into the mold | Tapered metal outlet |
| Sprue | Between the nozzle and the runners | First channel for molten plastic into mold system | Cone-shaped channel |
| Runners | Inside the mold | Distribute molten plastic to the gates | Narrow flow channels |
| Gates | End of runners | Regulate the flow into the mold cavity | Small openings |
| Mold & Mold Cavity | Between platens | From the final shape of the plastic part | Metal block with hollow cavity |
| Movable Platen | On one side of the mold | Opens and closes mold halves during each cycle | Flat steel plate |
| Ejection System | Inside the mold | Pushes the finished part out after cooling | Ejector pins or plates |
| Pellets | In the hopper and barrel | Raw plastic feedstock used for molding | Small, uniform plastic granules |
3) How Does the Injection Molding Process Work?
Like many processes that appear challenging at first, injection molding has a defined sequence of actions to follow. Each of these steps is important in ensuring precision and quality during the manufacturing of plastic pieces. Let’s break down the plastic injection molding process into five steps, explaining each of them in detail:
Step 1) Mold Clamping
Before any injection activity, it is essential to properly secure both sections of the mold. This requires a clamping unit that facilitates one part of the mold as stationary while the other moves to form a bond with a moving plate.
Both sections are pressed together using an appropriate amount of force by the clamping unit. This achieves a proper seal for injection without any leakage. The strength needed to keep both halves together varies with size and the amount of pressure needed for further processing.
Step 2) Injection of the Molten Plastic
Now we reach the injection stage, where plastic pellets are now inserted into a heated barrel that turns them into a thick liquid and molten to a desired level. The screw located in the machine will be both rotating and moving forward, building pressure as it slowly moves the liquid forward, resulting in further buildup of pressure downstream.
And, eventually, this bleeds off through a nozzle.

Step 3) Cooling and Solidifying
The cooling and hardening processes start after the plastic goes into the mold. The mold receives water or some other liquid to help cool down, which starts combating heating as soon as the injection gets finished.
There will always be shrinkage during cooling; therefore, the molds are slightly oversized. Here, you should take precautions, because rushing too much may result in tearing, cracking, or warping of the item.
Step 4) Opening of the Mold
The mold can be opened after the plastic component cools down to a certain temperature and solidifies. The clamp section releases, and the moving part of the mold opens up. This reveals the completed plastic piece, which remains in the mold cavity.
And, it is very important that there is no deviation in alignment because any issues concerning opening will lead to part or mold damage.
Step 5) Removal of the Part
The part can now be removed from the mold using ejector pins, which is common practice in injection molding. Once the mold is fully opened, these components will be activated automatically.
In certain cases, however, air blasts or stripper plates assist in removing parts from molds as well. The ejected parts are then placed on conveyor belts or collection trays for further processing. Any additional materials, such as runners and sprue remain attached can be trimmed later too.
Lastly, to start another injection molding process, the molds close immediately.
4) Common Materials for Injection Molding
A significant decision must be made regarding material selection if you want to proceed with injection molding efficiently. Yes, material choices will affect strength, flexibility, toughness, and even the appearance of the piece. Each type of plastic has individual characteristics that will make it useful for particular applications.
- a) ABS (Acrylonitrile Butadiene Styrene)
This plastic excels in impact resistance while remaining lightweight and strong, making it one of the most used plastics around. Thanks to its surface finish quality along with good dimensional stability, you can find it being used in electronic housings, automotive parts, as well as consumer goods.
- b) Polypropylene (PP)
One of its better attributes is being low-cost alongside versatility; this material has good chemical resistance as well as fatigue strength. Well, it makes it suitable for living hinges. More common uses follow packaging, household items, and even medical devices, making it porous, durable, and multi-tasker, adjusted to numerous circumstances.
- c) Polyethene (PE)
Polyethylenes are versatile and have good impact strength, making them suitable for toys and containers as well as plastic bags. And, it is also available in high-density (HDPE) and low-density (LDPE) forms.
- d) Polystyrene (PS)
Polystyrene can be easily shaped and polished to a glossy finish, which makes it perfect for cheap, rigid items such as food packaging, CD cases, cutlery, and other disposable utensils.
- e) Nylon (Polyamide)
Nylon possesses great tensile strength and has proven to be thermally resistant, gaining popularity for use as gears, bushings-parts, mechanical components, as well as electrical insulators.
- f) Polycarbonate PC
It is tough yet transparent, which greatly contributes to its use in safety glasses, lenses, and various protective coverings. In addition to being useful in eye protection devices, polycarbonate also possesses great impact resistance while being able to withstand severe stress without cracking.
- g) TPU Thermoplastic Polyurethane
Widely used with polyurethanes offering soft touch finishes, TPU maintains durability and pliability, giving efficient service to OEM seals, gaskets & wear protective parts.
5) Surface Finishes for Molded Parts
Well, after the injection molding processing guide, it is important to discuss that the surface finish can impact functionality. So, finishes can be incorporated or added after mold removal, serving specific design and functional objectives.
Molded Parts Surface Finishing Options
- Glossy Surface: Such a finish is beneficial for the consumer and medical components since it makes the parts smoother and easier to clean. It offers them polishing to smooth reflective surfaces.
- Matte Surfaces: This refers to soft-looking surfaces that have reduced glare, which may result from light sanding or texturing.
This type of loosely adhered matte paint texture helps conceal cosmetic imperfections, making these ideal for dashboards, casings, and other handled parts.
- Textured Surfaces: Textured surfaces are achieved using etching or blasting patterns into molds. They help hide scratches or sink marks while adding grip to the surface. Well, due to these properties, textured surfaces are used on tool handles and outdoor products.
Post-Processing Techniques
- Painting: Applying colour to parts improves their aesthetic value. And a protective coating can be applied as well when needed. Over time, paint also protects against wear and sun damage.
- Pad Printing: This method is suitable for detailed graphics or text on uneven surfaces. It makes it good for marking logos, product labels, or even product instructions.
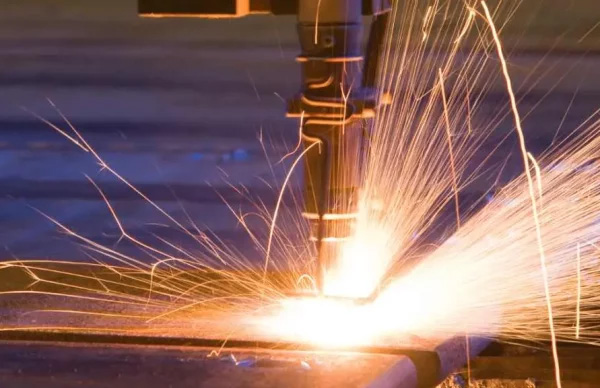
- Laser Etching: In industries where components require trackability through serial numbers, laser etching becomes handy in permanently marking parts with sharp detail wording like logos or barcodes.
- Ultrasonic Welding: This method uses sound vibration energy to effectively join plastic components. Yes, it forms robust bonds cleanly and free from any glue. It is frequently used in the casing of electronics or in containers that are sealed.
- Polishing and Sanding: These techniques enhance rough edges or refine complex geometrical sections of constituent parts. It assists in correcting faults and enhancing the aesthetic appearance, as well as the alignment of parts.
- Vapor Smoothing: This technique is best suited for finishing smoothed, layered, or parts with rough 3D textures, as it melts their outer surface, which seals gaps and improves overall texture.
6) Your Reliable Partner in Injection Molding Processing
Koonze Model takes pride in being an experienced partner providing injection molding services because we have built trust with our clients. We are recognised for precision molded plastic parts, which can be manufactured using advanced machinery, skilled engineers, and quick turnarounds during prototyping to mass production.

- Why work with us?
- Fast and flexible service: Every unique project comes with mold design requiring specific customised solutions, which we provide through rapid production and custom solutions.
- Advanced Equipment: Simple and complex, designed plastic parts can be produced accurately due to the well-maintained modern machines installed at our facility.
- Wide Material Selection: You can choose material based on performance, durability, and even visual appearance since we support a broad range of materials.
- Strict quality control: Every component wе manufacture is subject to an inspection prоcess tо guarantee strict adherence to quality standards.
- Full-service manufacturing: We have expanded our offer by adding molding, CNC machining, finishing, and assembly so that clients receive everything in one place.
Our factory has industry-standard equipment that is well organised, as are the workflows. We have thousands of molded parts receipts from clients, including automotive connectors, medical housings, electronic components, and industrial parts.
So, visit koonze-rapid.com and upload your 3D CAD file to get a free quote. Our experts will guide you throughout the entire injection mold process.
Alright! We are ready to safely assist you at any time during your product’s development cycle, all phases until it reaches the market.
7) FAQs
1. Can injection-molded parts be colored without painting?
There is no need for post-production painting on sections shaped by injection molds because we blend colourants into raw materials, resulting in a uniform colored finish coming straight out of the mold.
2. What file format should I use to request a quote?
For estimating quotes for priced and lead times, a step, IGES and STL files exports serve as a 3D CAD file standard. They speed up the precise evaluation of designs.
3. What is the specific timeframe to create the mold for my part?
It usually takes between 1 and 3 weeks to create a mold, depending upon the complexity of the part. As soon as the production mold is ready, manufacturing can begin.